Gradle Creating Executable JAR File
In this toturial we will show you how to configure Gradle build script to build the JAR file that can be executed by java command. In this article we just build the simple application without dependencies.
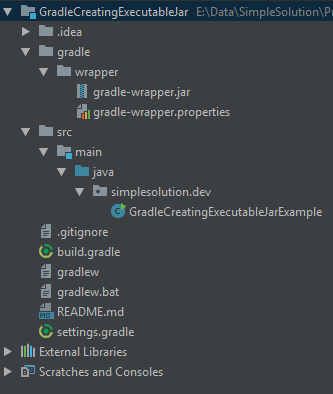
For example you have created a standard Gradle project as below structure.

With the main class GradleCreatingExecutableJarExample as below.
package simplesolution.dev;

public class GradleCreatingExecutableJarExample {

    public static void main(String... args) {
        System.out.println("Hello SimpleSolution.dev");
    }
}
To configure Gradle to build runnable JAR we need to add below configuration to build.gradle
jar {
    manifest {
        attributes 'Main-Class': 'simplesolution.dev.GradleCreatingExecutableJarExample'
    }
}
The config above to set the application’s entry point to use main class simplesolution.dev.GradleCreatingExecutableJarExample
The complete build.gradle look like below:
group 'simplesolution.dev'
version '1.0.0'

apply plugin: 'java'

sourceCompatibility = 1.8

repositories {
    mavenCentral()
}

jar {
    manifest {
        attributes 'Main-Class': 'simplesolution.dev.GradleCreatingExecutableJarExample'
    }
}
Execute command below build the .jar file
gradle jar
or
gradlew jar
The .jar file will be generated under directory build/libs

You can open command line, navigate to build/libs directory and use command below to execute the .jar file
java -jar GradleCreatingExecutableJar-1.0.0.jar
The output look like this
Hello SimpleSolution.dev
That’s all we need to know to configure Gradle build script to build executable JAR file.
Download Source Code
The source code in this article can be found at: https://github.com/simplesolutiondev/GradleCreatingExecutableJar
Happy Coding 😊