Spring Boot Access MySQL Database with Spring Data JPA
Tags: Spring Boot MySQL Spring Data JPA Data
Introduction
In this tutorial we walk you through step by step to create a Spring Boot application to access MySQL database using Spring Data JPA and MySQL Driver. Via step by step example we will create a Spring Boot project to save Customer entity into customer data table in MySQL database.
Create New Spring Boot Project
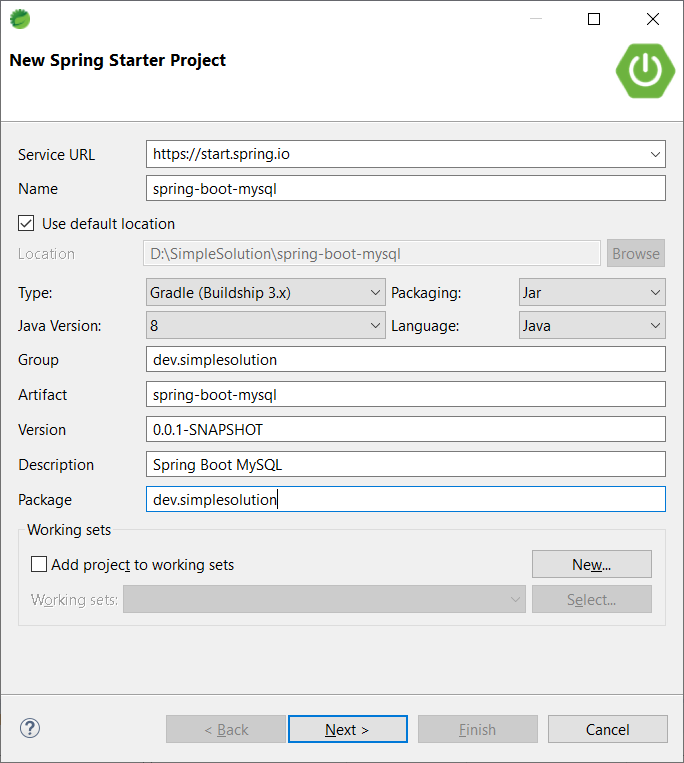
From Spring Tool Suite IDE select menu File > New > Spring Starter Project.
On the New Spring Starter Project popup input new project spring-boot-mysql information as following screenshot.
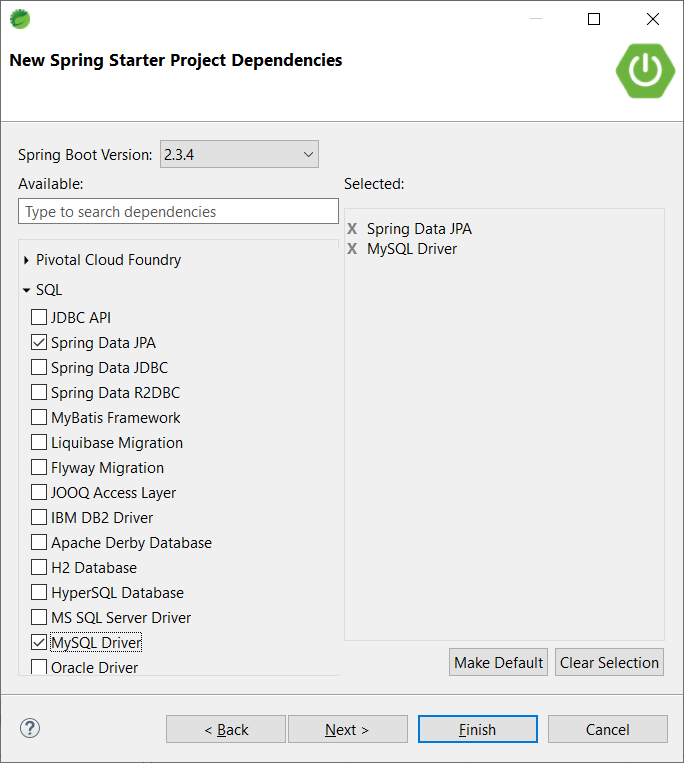
On the New Spring Starter Project Dependencies popup choose dependencies:
- Spring Data JPA
- MySQL Driver
Implement Entity and Repository
Create a new Java package named dev.simplesolution.entity and implement Customer class.
package dev.simplesolution.entity;

import javax.persistence.Entity;
import javax.persistence.GeneratedValue;
import javax.persistence.GenerationType;
import javax.persistence.Id;

@Entity
public class Customer {
	@Id
	@GeneratedValue(strategy = GenerationType.AUTO)
	private Long id;
	private String firstName;
	private String lastName;
	private String email;
	private String phone;

	public Long getId() {
		return id;
	}
	public void setId(Long id) {
		this.id = id;
	}
	public String getFirstName() {
		return firstName;
	}
	public void setFirstName(String firstName) {
		this.firstName = firstName;
	}
	public String getLastName() {
		return lastName;
	}
	public void setLastName(String lastName) {
		this.lastName = lastName;
	}
	public String getEmail() {
		return email;
	}
	public void setEmail(String email) {
		this.email = email;
	}
	public String getPhone() {
		return phone;
	}
	public void setPhone(String phone) {
		this.phone = phone;
	}
	@Override
	public String toString() {
		return "Customer [id=" + id + ", firstName=" + firstName + ", lastName=" + lastName + ", email=" + email + ", phone=" + phone + "]";
	}
}
Create a new Java package named dev.simplesolution.repository and define CustomerRepository interface.
package dev.simplesolution.repository;

import org.springframework.data.repository.CrudRepository;
import dev.simplesolution.entity.Customer;

public interface CustomerRepository extends CrudRepository<Customer, Long> {

}
Create Datatable on MySQL Server
Execute the SQL script below to create a new table named customer in your MySQL database.
CREATE TABLE `customer` (
`id` INT NOT NULL,
`first_name` VARCHAR(100) NULL,
`last_name` VARCHAR(100) NULL,
`email` VARCHAR(100) NULL,
`phone` VARCHAR(20) NULL,
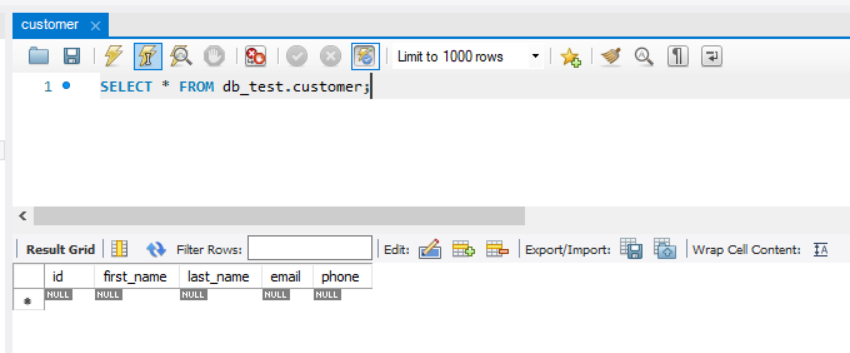
PRIMARY KEY (`id`));Following screenshot is the result we get after creating the new table. For example, we have created it in the db_test database.
Configure MySQL Connection
In order to connect to the database from the Spring Boot application we need to configure connection information.
Add the following configs to properties file at \src\main\resources\application.properties
spring.datasource.url=jdbc:mysql://localhost:3306/db_test
spring.datasource.username=root
spring.datasource.password=123@abc- spring.datasource.url to configure the URL to your database. For example we have the database named db_test at localhost server which is running on default MySQL port 3306.
- spring.datasource.username to configure the user name to access the MySQL database.
- spring.datasource.password to configure password of your MySQL user.
Create Read Update and Delete data from MySQL
Next step, create a new TestMySQLData class as the following code that tries to write and read data from MySQL server.
The new class implements CommandLineRunner interface to indicate that it will be executed when Spring Boot application is started.
package dev.simplesolution;

import java.util.ArrayList;
import java.util.List;

import org.slf4j.Logger;
import org.slf4j.LoggerFactory;
import org.springframework.beans.factory.annotation.Autowired;
import org.springframework.boot.CommandLineRunner;
import org.springframework.stereotype.Component;

import dev.simplesolution.entity.Customer;
import dev.simplesolution.repository.CustomerRepository;

@Component
public class TestMySQLData implements CommandLineRunner {

	private Logger logger = LoggerFactory.getLogger(TestMySQLData.class);

	@Autowired
	private CustomerRepository customerRepository;

	@Override
	public void run(String... args) throws Exception {
		// create new customer
		Customer newCustomer = new Customer();
		newCustomer.setFirstName("John");
		newCustomer.setLastName("Doe");
		newCustomer.setEmail("john@simplesolution.dev");
		newCustomer.setPhone("123-456-789");
		customerRepository.save(newCustomer);

		List<Customer> customers = new ArrayList<>();
		customerRepository.findAll().forEach(customers::add);
		for(Customer customer: customers) {
			logger.info("Customer: " + customer.toString());
		}
	}
}
You also can Update and Delete data by using customerRepository.save() and customerRepository.delete() method.
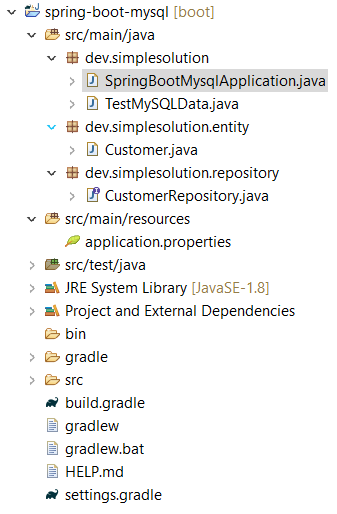
Final Application
The final Spring Boot application structure looks like the following screenshot.
Run the Spring Boot application and we can see the following logs in the console.
2020-10-20 00:54:09.166 INFO 20168 --- [ main] dev.simplesolution.TestMySQLData : Customer: Customer [id=7, firstName=John, lastName=Doe, email=john@simplesolution.dev, phone=123-456-789]Select data from MySQL database.

Conclusion
In this tutorial we have implemented the basic Spring Boot console application that uses the Spring Data JPA and MySQL Driver dependency to access MySQL database.
Download Source Code
The source code in this article can be found at: github.com/simplesolutiondev/spring-boot-mysql
or clone at:
git clone https://github.com/simplesolutiondev/spring-boot-mysql.git
or download at:
Happy Coding 😊