Spring Boot Restful API and Vue.js Frontend
Tags: Spring Boot Vue.js Restful API RestController
Introduction
In this full stack Spring Boot tutorial, we learn how to implement a web application using Spring Boot as back end restful API and Vue.js at the front end side. Via step by step guide we show you how to implement the sample project named Customer Manager to manage customer information.
Create New Spring Boot Restful API Project
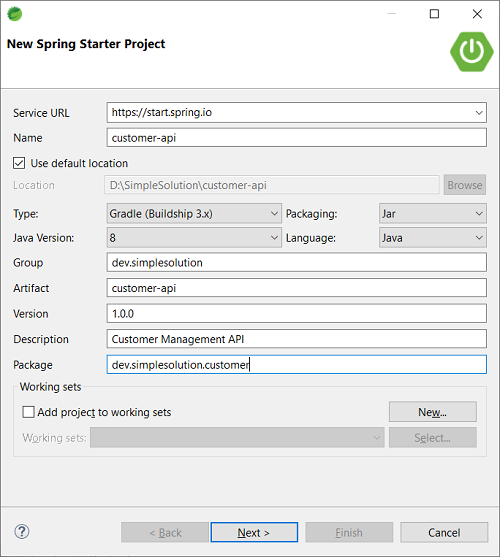
Open Spring Tool Suite IDE, select menu File > New > Spring Starter Project.
On the New Spring Starter Project popup input new project information as below and click Next.
- Name: customer-api
- Group: dev.simplesolution
- Artifact: customer-api
- Version: 1.0.0
- Description: Customer Management API
- Package: dev.simplesolution.customer
On the New Spring Starter Project Dependencies popup choose dependencies as below and click Next.
- Spring Data JPA
- MySQL Driver
- Spring Web
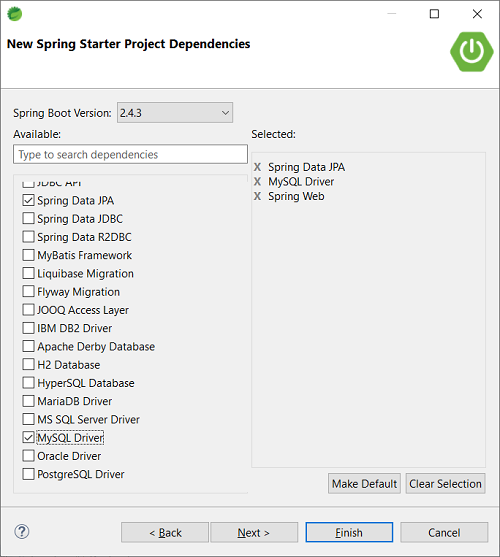
Keep the information on the next popup as default and click Finish.
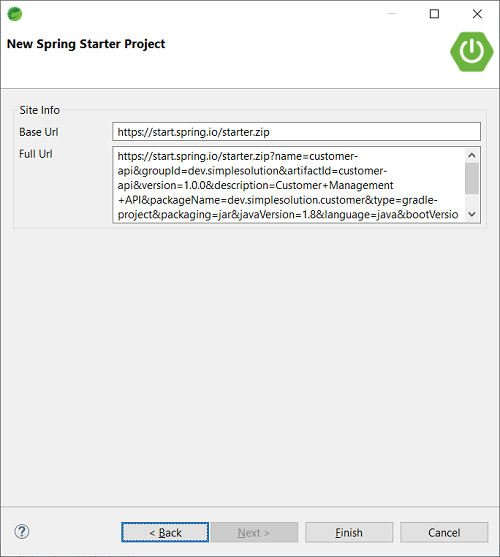
You can also creating new Spring Boot project using Spring initializr online tool at start.spring.io
Create new MySQL database to manage customer information
On your local MySQL database server, create a new database schema named customerdb.
Execute the following SQL script on the customerdb database to create a table named customer.
CREATE TABLE `customer` (
  `id` INT NOT NULL AUTO_INCREMENT ,
  `first_name` VARCHAR(100) NULL,
  `last_name` VARCHAR(100) NULL,
  `email` VARCHAR(100) NULL,
  `phone` VARCHAR(20) NULL,
  PRIMARY KEY (`id`));
Configure MySQL connection string for the Spring Boot project
Add the following configurations to application.properties file in order to connect to the customerdb database on your MySQL server.
customer-api/src/main/resources/application.properties
spring.datasource.url=jdbc:mysql://localhost:3306/customerdb
spring.datasource.username=root
spring.datasource.password=123@abc- spring.datasource.url to configure the URL to your database. For example we have the database named customerdb at localhost server which is running on default MySQL port 3306.
- spring.datasource.username to configure the user name to access the MySQL database.
- spring.datasource.password to configure password of your MySQL user.
Implement Entity class and Repository interface
Create a new Java package named dev.simplesolution.customer.entity, and add a new class named Customer.
customer-api/src/main/java/dev/simplesolution/customer/entity/Customer.java
package dev.simplesolution.customer.entity;

import javax.persistence.Column;
import javax.persistence.Entity;
import javax.persistence.GeneratedValue;
import javax.persistence.GenerationType;
import javax.persistence.Id;

@Entity
public class Customer {

	@Id
	@GeneratedValue(strategy = GenerationType.IDENTITY)
	private Long id;

	@Column(name = "first_name")
	private String firstName;

	@Column(name = "last_name")
	private String lastName;

	@Column(name = "email")
	private String email;

	@Column(name = "phone")
	private String phone;

	public Long getId() {
		return id;
	}

	public void setId(Long id) {
		this.id = id;
	}

	public String getFirstName() {
		return firstName;
	}

	public void setFirstName(String firstName) {
		this.firstName = firstName;
	}

	public String getLastName() {
		return lastName;
	}

	public void setLastName(String lastName) {
		this.lastName = lastName;
	}

	public String getEmail() {
		return email;
	}

	public void setEmail(String email) {
		this.email = email;
	}

	public String getPhone() {
		return phone;
	}

	public void setPhone(String phone) {
		this.phone = phone;
	}
}
Create a new Java package named dev.simplesolution.customer.repository, and implement a new interface named CustomerRepository.
customer-api/src/main/java/dev/simplesolution/customer/repository/CustomerRepository.java
package dev.simplesolution.customer.repository;

import org.springframework.data.repository.CrudRepository;

import dev.simplesolution.customer.entity.Customer;

public interface CustomerRepository extends CrudRepository<Customer, Long> {

}
Implement Restful API Controller
Create a new Java package named dev.simplesolution.customer.controller, and implement a new class named CustomerController.
customer-api/src/main/java/dev/simplesolution/customer/controller/CustomerController.java
package dev.simplesolution.customer.controller;
import org.slf4j.Logger;
import org.slf4j.LoggerFactory;
import org.springframework.beans.factory.annotation.Autowired;
import org.springframework.http.HttpStatus;
import org.springframework.http.ResponseEntity;
import org.springframework.web.bind.annotation.CrossOrigin;
import org.springframework.web.bind.annotation.DeleteMapping;
import org.springframework.web.bind.annotation.GetMapping;
import org.springframework.web.bind.annotation.PathVariable;
import org.springframework.web.bind.annotation.PostMapping;
import org.springframework.web.bind.annotation.PutMapping;
import org.springframework.web.bind.annotation.RequestBody;
import org.springframework.web.bind.annotation.RequestMapping;
import org.springframework.web.bind.annotation.RestController;
import dev.simplesolution.customer.entity.Customer;
import dev.simplesolution.customer.repository.CustomerRepository;
@CrossOrigin(origins = "http://localhost:8081")
@RestController
@RequestMapping("/api")
public class CustomerController {
private Logger logger = LoggerFactory.getLogger(CustomerController.class);
@Autowired
private CustomerRepository customerRepository;
@GetMapping("/customers")
public ResponseEntity<Object> getAllCustomers(){
try {
Iterable<Customer> customers = customerRepository.findAll();
return new ResponseEntity<Object>(customers, HttpStatus.OK);
} catch(Exception ex) {
logger.error(ex.getMessage(), ex);
return new ResponseEntity<Object>(HttpStatus.BAD_REQUEST);
}
}
@GetMapping("/customers/{id}")
public ResponseEntity<Object> getCustomerById(@PathVariable("id") Long id) {
try {
Customer customer = customerRepository.findById(id).get();
if(customer != null) {
return new ResponseEntity<Object>(customer, HttpStatus.OK);
} else {
return new ResponseEntity<Object>(HttpStatus.NOT_FOUND);
}
} catch(Exception ex) {
logger.error(ex.getMessage(), ex);
return new ResponseEntity<Object>(HttpStatus.BAD_REQUEST);
}
}
@PostMapping("/customers")
public ResponseEntity<Object> createCustomer(@RequestBody Customer customer) {
try {
Customer savedCustomer = customerRepository.save(customer);
return new ResponseEntity<Object>(savedCustomer, HttpStatus.OK);
} catch(Exception ex) {
logger.error(ex.getMessage(), ex);
return new ResponseEntity<Object>(HttpStatus.BAD_REQUEST);
}
}
@PutMapping("/customers/{id}")
public ResponseEntity<Object> updateCustomer(@PathVariable("id") Long id, @RequestBody Customer customer) {
try {
customer.setId(id);
Customer savedCustomer = customerRepository.save(customer);
return new ResponseEntity<Object>(savedCustomer, HttpStatus.OK);
} catch(Exception ex) {
logger.error(ex.getMessage(), ex);
return new ResponseEntity<Object>(HttpStatus.BAD_REQUEST);
}
}
@DeleteMapping("/customers/{id}")
public ResponseEntity<HttpStatus> deleteCustomer(@PathVariable("id") Long id) {
try {
customerRepository.deleteById(id);
return new ResponseEntity<HttpStatus>(HttpStatus.OK);
} catch(Exception ex) {
logger.error(ex.getMessage(), ex);
return new ResponseEntity<HttpStatus>(HttpStatus.BAD_REQUEST);
}
}
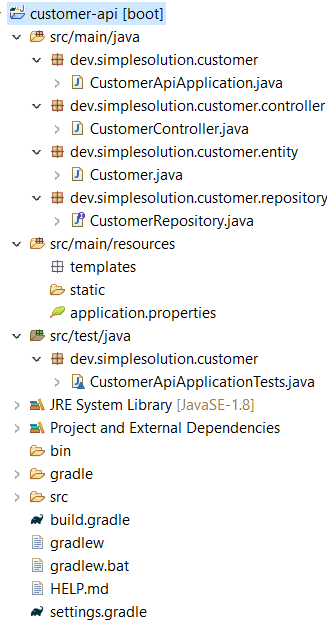
}Final Spring Boot Restful API Source Code Structure
With the above steps, we have finished implementing the Spring Boot Restful API project to manage customer information with the source code structure as below screenshot.
Run Spring Boot Restful API Application
Execute the Spring Boot application we have the Restful API started at http://localhost:8080 which exposes the following APIs.
| URL | HTTP Method | Description |
|---|---|---|
| /api/customers | GET | Get all customers |
| /api/customers/{id} | GET | Get customer by ID |
| /api/customers | POST | Create a new customer |
| /api/customers/{id} | PUT | Update existing customer |
| /api/customers/{id} | DELETE | Delete customer by ID |
Create New Vue.js project
From your Terminal, execute the following command to create a new Vue.js project.
vue create customer-frontendAfter vue finish creating your project, navigate to the project directory using the following command.
cd customer-frontendExecute the following command to add Vue Router library to your Vue.js project
npm install vue-routerExecute the following command to add axios to your Vue.js project
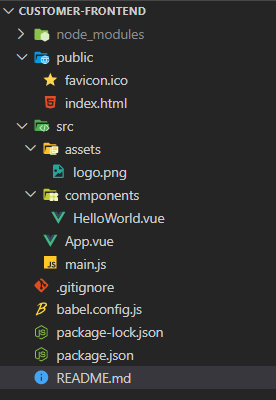
npm install axiosOpen the project just created using Visual Code application, you have the new Vue.js project source code structure as following screenshot.
Add Bootstrap CSS to the Vue.js project
Add the link tag below to public/index.html file to apply Bootstrap CSS to the Vue.js project.
<link href="https://cdn.jsdelivr.net/npm/bootstrap@5.0.0-beta2/dist/css/bootstrap.min.css" rel="stylesheet">customer-frontend/public/index.html
<!DOCTYPE html>
<html lang="">
  <head>
    <meta charset="utf-8">
    <meta http-equiv="X-UA-Compatible" content="IE=edge">
    <meta name="viewport" content="width=device-width,initial-scale=1.0">
    <link rel="icon" href="<%= BASE_URL %>favicon.ico">
    <link href="https://cdn.jsdelivr.net/npm/bootstrap@5.0.0-beta2/dist/css/bootstrap.min.css" rel="stylesheet">
    <title><%= htmlWebpackPlugin.options.title %></title>
  </head>
  <body>
    <noscript>
      <strong>We're sorry but <%= htmlWebpackPlugin.options.title %> doesn't work properly without JavaScript enabled. Please enable it to continue.</strong>
    </noscript>
    <div id="app"></div>
    <!-- built files will be auto injected -->
  </body>
</html>
Define Vue Router
Create a new JavaScript file at src/router.js and implement Vue router as the following code.
customer-frontend/src/router.js
import Vue from 'vue'
import Router from 'vue-router'

Vue.use(Router)

export default new Router({
    mode: 'history',
    routes: [
        {
            path: '/',
            alias: '/customers',
            name: 'customers',
            component: () => import('./components/CustomerList')
        },
        {
            path: '/customers/:id',
            name: 'edit-customer',
            component: () => import('./components/EditCustomer')
        },
        {
            path: '/add',
            name: 'add-customer',
            component: () => import('./components/AddCustomer')
        }
    ]
})
Modify the src/main.js to add the router as the following code.
customer-frontend/src/main.js
import Vue from 'vue'
import App from './App.vue'
import router from './router'

Vue.config.productionTip = false

new Vue({
  router,
  render: h => h(App),
}).$mount('#app')
Implement Navbar and Router View
Modify the src/App.vue to add Navbar and Router view as following code.
customer-frontend/src/App.vue
<template>
  <div id="app">
    <nav class="navbar navbar-expand-lg navbar-dark bg-dark">
      <div class="container-fluid">
        <router-link to="/" class="navbar-brand">Customer Manager</router-link>
        <div class="collapse navbar-collapse">
          <div class="navbar-nav">
            <router-link to="/customers" class="nav-link">Customer List</router-link>
            <router-link to="/add" class="nav-link">Add New Customer</router-link>
          </div>
        </div>
      </div>
    </nav>
    <div class="container">
      <router-view />
    </div>
  </div>
</template>

<script>
export default {
  name: 'App'
}
</script>
Setup Axios for the Vue.js project
Create a new JavaScript file at src/http-common.js and setting the base URL for Axios as below.
customer-frontend/src/http-common.js
import axios from 'axios'

export default axios.create({
    baseURL: "http://localhost:8080/api",
    headers: {
        'Content-Type': 'application/json'
    }
})
Implement data service class
Under src directory, create a new directory named services and implement a new class named CustomerDataService to communicate with the Restful APIs.
customer-frontend/src/services/CustomerDataService.js
import http from '../http-common'

class CustomerDataService {
    getAll() {
        return http.get('/customers')
    }

    get(id) {
        return http.get(`/customers/${id}`)
    }

    create(data) {
        return http.post('/customers', data)
    }

    update(id, data) {
        return http.put(`/customers/${id}`, data)
    }

    delete(id) {
        return http.delete(`/customers/${id}`)
    }
}

export default new CustomerDataService()
Implement AddCustomer Component
In the components directory, create a new source file AddCustomer.vue and implement the add new customer feature as below.
customer-frontend/src/components/AddCustomer.vue
<template>
    <div>
        <div v-if="!submitted">
            <div class="mb-3">
                <label for="firstName" class="form-label">First Name</label>
                <input type="text" class="form-control" id="firstName" required name="firstName" v-model="customer.firstName">
            </div>
            <div class="mb-3">
                <label for="lastName" class="form-label">Last Name</label>
                <input type="text" class="form-control" id="lastName" required name="lastName" v-model="customer.lastName">
            </div>
            <div class="mb-3">
                <label for="email" class="form-label">Email</label>
                <input type="email" class="form-control" id="email" required name="email" v-model="customer.email">
            </div>
            <div class="mb-3">
                <label for="phone" class="form-label">Phone</label>
                <input type="text" class="form-control" id="phone" required name="phone" v-model="customer.phone">
            </div>
            <div class="mb-3">
                <button @click="saveCustomer" class="btn btn-primary">Submit</button>
            </div>
        </div>
        <div v-else>
            <div class="alert alert-success" role="alert">
                Save customer successfully!
            </div>
            <button @click="newCustomer" class="btn btn-primary">Add New Customer</button>
        </div>
    </div>
</template>

<script>
import CustomerDataService from '../services/CustomerDataService'

export default {
    name: 'add-customer',
    data() {
        return {
            customer: {
                id: null,
                firstName: "",
                lastName: "",
                email: "",
                phone: ""
            },
            submitted: false
        }
    },
    methods: {
        saveCustomer() {
            var data = {
                firstName: this.customer.firstName,
                lastName: this.customer.lastName,
                email: this.customer.email,
                phone: this.customer.phone
            }
            CustomerDataService.create(data)
                .then(response => {
                    this.customer.id = response.data.id
                    this.submitted = true;
                })
                .catch( e => {
                    alert(e)
                })
        },
        newCustomer() {
            this.submitted = false
            this.customer = {}
        }
    }
}
</script>
Implement EditCustomer Component
In the components directory, create a new source file EditCustomer.vue to implement the edit existing customer feature as below.
customer-frontend/src/components/EditCustomer.vue
<template>
    <div v-if="currentCustomer">
        <div class="mb-3">
                <label for="firstName" class="form-label">First Name</label>
                <input type="text" class="form-control" id="firstName" required name="firstName" v-model="currentCustomer.firstName">
            </div>
            <div class="mb-3">
                <label for="lastName" class="form-label">Last Name</label>
                <input type="text" class="form-control" id="lastName" required name="lastName" v-model="currentCustomer.lastName">
            </div>
            <div class="mb-3">
                <label for="email" class="form-label">Email</label>
                <input type="email" class="form-control" id="email" required name="email" v-model="currentCustomer.email">
            </div>
            <div class="mb-3">
                <label for="phone" class="form-label">Phone</label>
                <input type="text" class="form-control" id="phone" required name="phone" v-model="currentCustomer.phone">
            </div>
            <div class="mb-3">
                <button @click="updateCustomer" class="btn btn-primary me-3">Update</button>
                <button @click="deleteCustomer" class="btn btn-danger">Delete</button>
            </div>
             <div class="alert alert-success" role="alert" v-if="message">
                {{message}}
            </div>
    </div>
</template>

<script>
import CustomerDataService from '../services/CustomerDataService'

export default {
    name: 'edit-customer',
    data() {
        return {
            currentCustomer: null,
            message: ''
        }
    },
    methods: {
        getCustomer(id) {
            CustomerDataService.get(id)
                .then(response => {
                    this.currentCustomer = response.data
                })
                .catch(e => {
                    alert(e)
                })
        },
        updateCustomer() {
            CustomerDataService.update(this.currentCustomer.id, this.currentCustomer)
                .then(() => {
                    this.message = 'The customer was updated successfully!'
                })
                .catch(e => {
                    alert(e)
                })
        },
        deleteCustomer() {
            CustomerDataService.delete(this.currentCustomer.id)
                .then(() => {
                    this.$router.push({name: 'customers'})
                })
                .catch(e => {
                    alert(e)
                })
        }
    },
    mounted() {
        this.getCustomer(this.$route.params.id)
    }
}
</script>
Implement CustomerList Component
In the components directory, create a new source file CustomerList.vue to implement the customer list feature as below.
customer-frontend/src/components/CustomerList.vue
<template>
    <div>
        <table class="table">
            <thead>
                <tr>
                <th scope="col">First Name</th>
                <th scope="col">Last Name</th>
                <th scope="col">Email</th>
                <th scope="col">Phone</th>
                <th scope="col">Actions</th>
                </tr>
            </thead>
            <tbody v-for="(customer, index) in customers" :key="index">
                <tr>
                    <td>{{customer.firstName}}</td>
                    <td>{{customer.lastName}}</td>
                    <td>{{customer.email}}</td>
                    <td>{{customer.phone}}</td>
                    <td><a :href="'/customers/' + customer.id" class="btn btn-primary">Edit</a></td>
                </tr>
            </tbody>
        </table>
    </div>
</template>

<script>
import CustomerDataService from '../services/CustomerDataService'

export default {
    name: 'customers',
    data() {
        return {
            customers: []
        }
    },
    methods: {
        retrieveCustomers() {
            CustomerDataService.getAll()
                .then(response => {
                    this.customers = response.data
                })
                .catch(e => {
                    alert(e)
                })
        }
    },
    mounted() {
        this.retrieveCustomers()
    }
}
</script>
Configure Development Server Port for Vue.js Application
From the root directory of the Vue.js project, create a new JavaScript file named vue.config.js and add configuration code as below to allow the web app running at port 8081.
customer-frontend/vue.config.js
module.exports = {
    devServer: {
      port: 8081
    }
  }
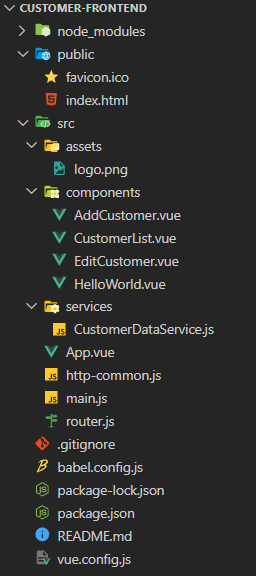
Final Vue.js Source Code Structure
After the above steps, we have the Vue.js application with source code structure as below screenshot.
Run Vue.js Application
To run the Vue.js application, open your terminal then navigate to the vue.js project directory and execute the following command.
npm run serve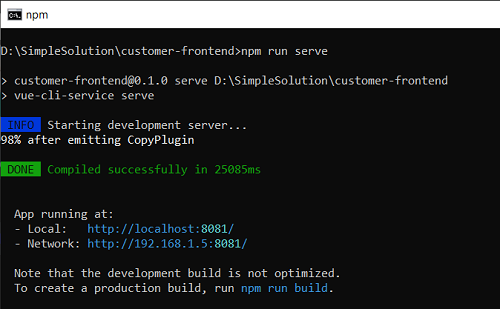
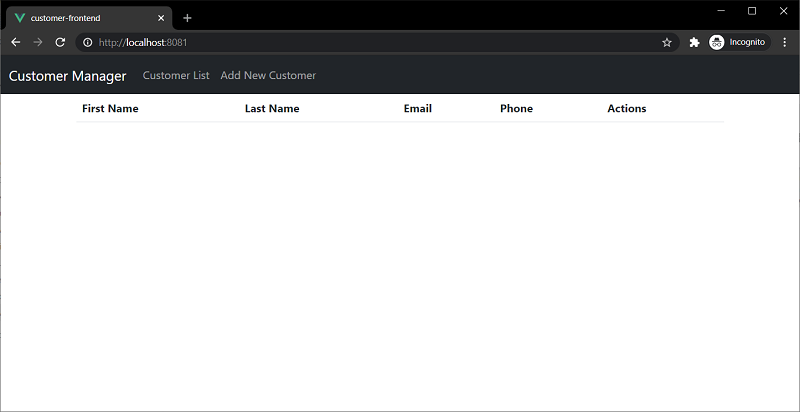
Open http://localhost:8081/ on your browser to see the empty customer list.
Click the Add New Customer menu to add a new customer record.
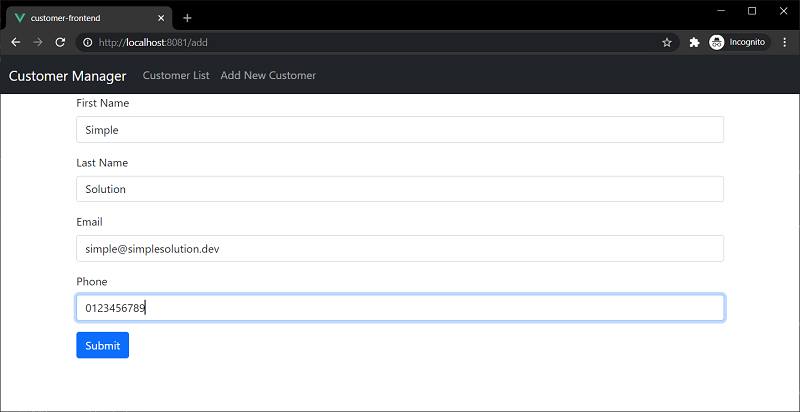
Click on Submit button to save customer.
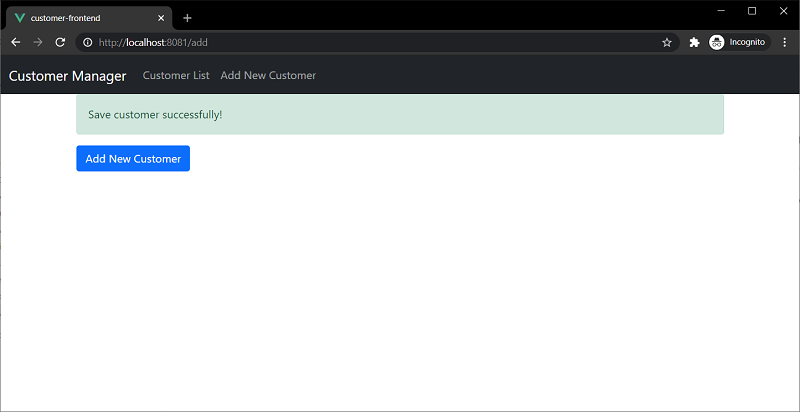
Navigate to the Customer List to show the list of customers.
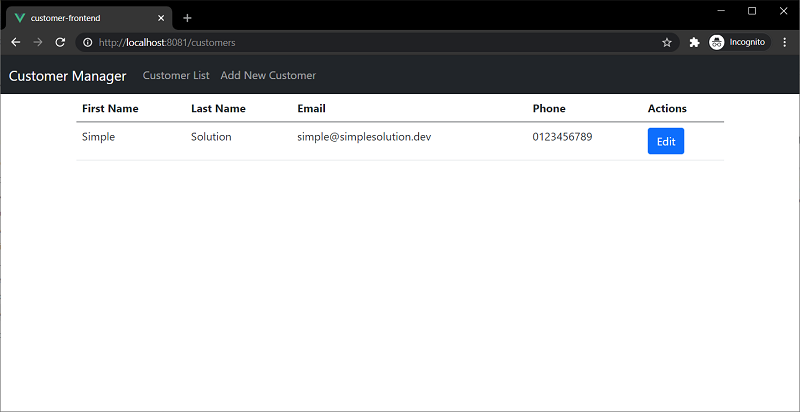
Click on Edit button to show Edit customer page as below.
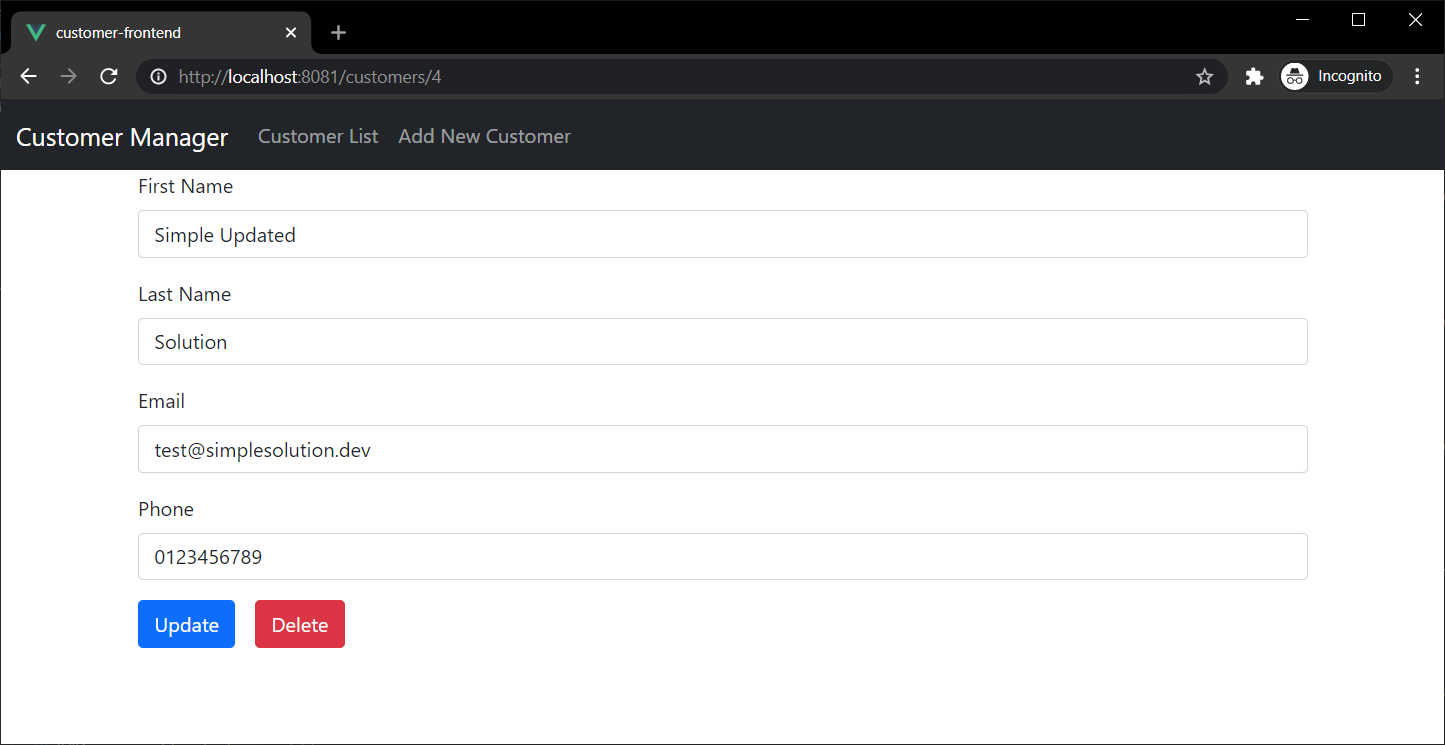
Edit data and click Update to save the customer data.

On the above page you can also click on Delete to delete the customer record.
Conclusion
In this tutorial we have finished the step by step guide to implement a Restful API with Spring Boot and MySQL as data storage. Then we use Vue.js to implement a Frontend web application that communicates with Restful APIs. We also finished a completed project source code called Customer Manager with CRUD features to manage customer records.
Download Source Code
The source code in this article can be found at: github.com/simplesolutiondev/spring-boot-restful-api-vuejs-frontend
or clone at:
git clone https://github.com/simplesolutiondev/spring-boot-restful-api-vuejs-frontend.git
or download at:
Happy Coding 😊