Using Dozer Spring Boot Starter
Tags: Java Spring Boot Dozer
In this Spring Boot tutorial we will go through step by step guide to creating a Spring Boot console application and configure Dozer Spring Boot Starter library to using Dozer mapping in Spring Boot application.
Creating Spring Boot Console Application Project
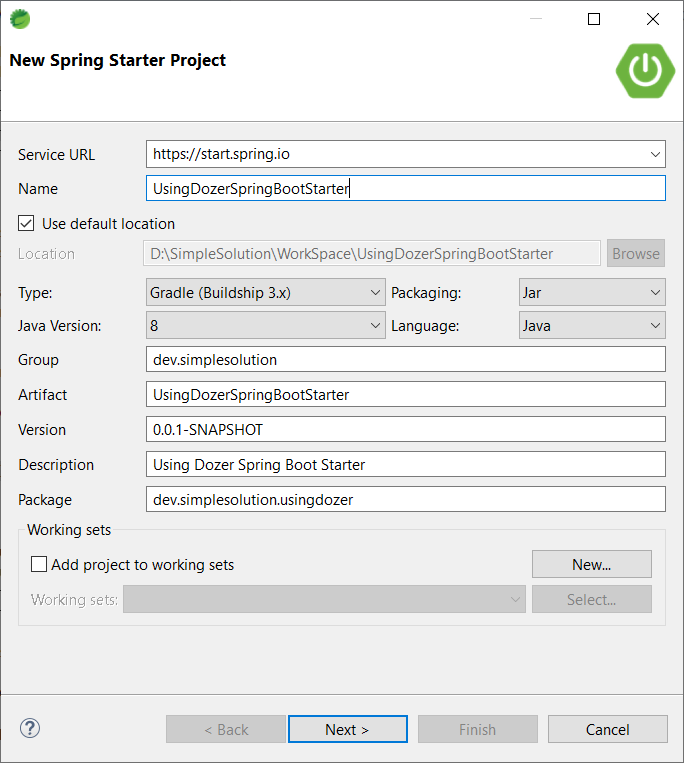
Open your Spring Tool Suite IDE and choose menu File -> New -> Spring Starter Project
In New Spring Starter Project window input below informations for your project and click Next.

Keeping default values in next New Spring Starter Project Dependencies window and click Finish button to finishing project creation.
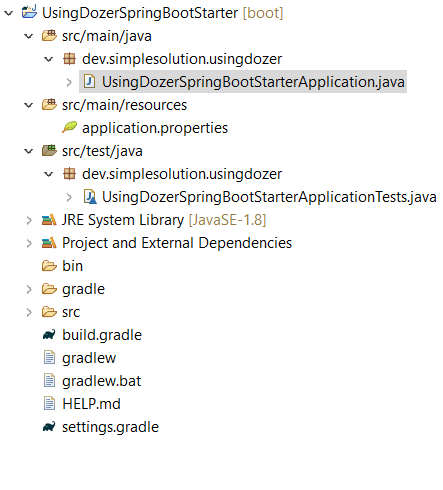
The new project will be created as below structure on your IDE.

build.gradle file content
plugins {
	id 'org.springframework.boot' version '2.2.2.RELEASE'
	id 'io.spring.dependency-management' version '1.0.8.RELEASE'
	id 'java'
}

group = 'dev.simplesolution'
version = '0.0.1-SNAPSHOT'
sourceCompatibility = '1.8'

repositories {
	mavenCentral()
}

dependencies {
	implementation 'org.springframework.boot:spring-boot-starter'
	testImplementation('org.springframework.boot:spring-boot-starter-test') {
		exclude group: 'org.junit.vintage', module: 'junit-vintage-engine'
	}
}

test {
	useJUnitPlatform()
}
UsingDozerSpringBootStarterApplication.java file content
package dev.simplesolution.usingdozer;

import org.springframework.boot.SpringApplication;
import org.springframework.boot.autoconfigure.SpringBootApplication;

@SpringBootApplication
public class UsingDozerSpringBootStarterApplication {

	public static void main(String[] args) {
		SpringApplication.run(UsingDozerSpringBootStarterApplication.class, args);
	}

}
Implement CommandLineRunner interface
Firstly implement CommandLineRunner interface for your UsingDozerSpringBootStarterApplication class. Spring Boot will trigger and run the run(String… args) method of this interface as the starting point of your console application.
And declare logger object for logging message later.
package dev.simplesolution.usingdozer;

import org.slf4j.Logger;
import org.slf4j.LoggerFactory;
import org.springframework.boot.CommandLineRunner;
import org.springframework.boot.SpringApplication;
import org.springframework.boot.autoconfigure.SpringBootApplication;

@SpringBootApplication
public class UsingDozerSpringBootStarterApplication implements CommandLineRunner {

	private static Logger logger = LoggerFactory.getLogger(UsingDozerSpringBootStarterApplication.class);

	public static void main(String[] args) {
		SpringApplication.run(UsingDozerSpringBootStarterApplication.class, args);
	}

	@Override
	public void run(String... args) throws Exception {
		// Your Application code will be place here.
		logger.info("Starting Application...");

	}

}
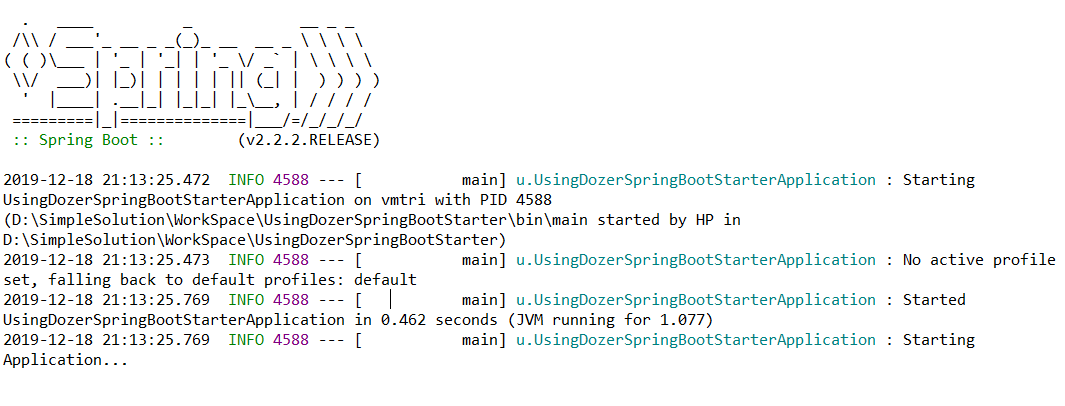
Now run the application you will get the result on your console as screenshot below.

In orde to write the example code for using Dozer mapping we will create two class named SourceContact and DestinationContact.
Implement SourceContact.java class
package dev.simplesolution.usingdozer.model;

public class SourceContact {
	private Integer id;
	private String name;
	private String email;
	private String phone;
	private String address;

	public Integer getId() {
		return id;
	}
	public void setId(Integer id) {
		this.id = id;
	}
	public String getName() {
		return name;
	}
	public void setName(String name) {
		this.name = name;
	}
	public String getEmail() {
		return email;
	}
	public void setEmail(String email) {
		this.email = email;
	}
	public String getPhone() {
		return phone;
	}
	public void setPhone(String phone) {
		this.phone = phone;
	}
	public String getAddress() {
		return address;
	}
	public void setAddress(String address) {
		this.address = address;
	}

}
Implement DestinationContact.java class
package dev.simplesolution.usingdozer.model;

public class DestinationContact {
	private Integer identity;
	private String fullName;
	private String emailAddress;
	private String phoneNumber;
	private String addressLine;

	public Integer getIdentity() {
		return identity;
	}
	public void setIdentity(Integer identity) {
		this.identity = identity;
	}
	public String getFullName() {
		return fullName;
	}
	public void setFullName(String fullName) {
		this.fullName = fullName;
	}
	public String getEmailAddress() {
		return emailAddress;
	}
	public void setEmailAddress(String emailAddress) {
		this.emailAddress = emailAddress;
	}
	public String getPhoneNumber() {
		return phoneNumber;
	}
	public void setPhoneNumber(String phoneNumber) {
		this.phoneNumber = phoneNumber;
	}
	public String getAddressLine() {
		return addressLine;
	}
	public void setAddressLine(String addressLine) {
		this.addressLine = addressLine;
	}

}
Adding Dozer Core and Dozer Spring Boot Starter dependencies
Adding dependencies to your build.gradle file if you are using Gralde build.
compile group: 'com.github.dozermapper', name: 'dozer-core', version: '6.5.0'
compile group: 'com.github.dozermapper', name: 'dozer-spring-boot-starter', version: '6.5.0'
or below XML to pom.xml if you are using Maven build for your project
<dependency>
    <groupId>com.github.dozermapper</groupId>
    <artifactId>dozer-core</artifactId>
    <version>6.5.0</version>
</dependency>
<dependency>
    <groupId>com.github.dozermapper</groupId>
    <artifactId>dozer-spring-boot-starter</artifactId>
    <version>6.5.0</version>
</dependency>
Configure Dozer mapping in XML file
Creating mapping.xml file in src/main/resources/ path and configure the mapping for SourceContact and DestinationContact classes
<?xml version="1.0" encoding="UTF-8"?>
<mappings xmlns="http://dozermapper.github.io/schema/bean-mapping"
          xmlns:xsi="http://www.w3.org/2001/XMLSchema-instance"
          xsi:schemaLocation="http://dozermapper.github.io/schema/bean-mapping http://dozermapper.github.io/schema/bean-mapping.xsd">
    <mapping>
        <class-a>dev.simplesolution.usingdozer.model.SourceContact</class-a>
        <class-b>dev.simplesolution.usingdozer.model.DestinationContact</class-b>
        <field>
            <a>id</a>
            <b>identity</b>
        </field>
        <field>
            <a>name</a>
            <b>fullName</b>
        </field>
        <field>
            <a>email</a>
            <b>emailAddress</b>
        </field>
        <field>
            <a>phone</a>
            <b>phoneNumber</b>
        </field>
        <field>
            <a>address</a>
            <b>addressLine</b>
        </field>
    </mapping>
</mappings>
Configure Dozer mapping files
Open application.properties file and adding below setting to allow Dozer Spring Boot Starter figure out your mapping.xml file location.
dozer.mapping-files=classpath:mapping.xmlUsing Dozer Mapper to perform mapping the objects
Up to this step you are finish configure the Dozer Spring Boot Starter.
Next step we will learn how to use Dozer Mapper class on the application.
Open UsingDozerSpringBootStarterApplication.java main class and adding below private field.
@Autowired
private Mapper mapper;
Below are example of how to map the SourceContact object into DestinationContact object
  @Override
	public void run(String... args) throws Exception {
		// Your Application code will be place here.
		logger.info("Starting Application...");

		SourceContact sourceContact = new SourceContact();
		sourceContact.setId(73);
		sourceContact.setName("Sophie");
		sourceContact.setPhone("1234567890");
		sourceContact.setEmail("testing@simplesolution.dev");
		sourceContact.setAddress("New York city");

		DestinationContact destinationContact = new DestinationContact();

		// Map source object to destination object
		mapper.map(sourceContact, destinationContact);

		// Logging destination object data
		logger.info(destinationContact.getIdentity().toString());
		logger.info(destinationContact.getFullName());
		logger.info(destinationContact.getPhoneNumber());
		logger.info(destinationContact.getEmailAddress());
		logger.info(destinationContact.getAddressLine());
	}
Finally your UsingDozerSpringBootStarterApplication.java code look like below.
package dev.simplesolution.usingdozer;

import org.slf4j.Logger;
import org.slf4j.LoggerFactory;
import org.springframework.beans.factory.annotation.Autowired;
import org.springframework.boot.CommandLineRunner;
import org.springframework.boot.SpringApplication;
import org.springframework.boot.autoconfigure.SpringBootApplication;

import com.github.dozermapper.core.Mapper;

import dev.simplesolution.usingdozer.model.DestinationContact;
import dev.simplesolution.usingdozer.model.SourceContact;

@SpringBootApplication
public class UsingDozerSpringBootStarterApplication implements CommandLineRunner {

	private static Logger logger = LoggerFactory.getLogger(UsingDozerSpringBootStarterApplication.class);

	@Autowired
	private Mapper mapper;

	public static void main(String[] args) {
		SpringApplication.run(UsingDozerSpringBootStarterApplication.class, args);
	}

	@Override
	public void run(String... args) throws Exception {
		// Your Application code will be place here.
		logger.info("Starting Application...");

		SourceContact sourceContact = new SourceContact();
		sourceContact.setId(73);
		sourceContact.setName("Sophie");
		sourceContact.setPhone("1234567890");
		sourceContact.setEmail("testing@simplesolution.dev");
		sourceContact.setAddress("New York city");

		DestinationContact destinationContact = new DestinationContact();

		// Map source object to destination object
		mapper.map(sourceContact, destinationContact);

		// Logging destination object data
		logger.info(destinationContact.getIdentity().toString());
		logger.info(destinationContact.getFullName());
		logger.info(destinationContact.getPhoneNumber());
		logger.info(destinationContact.getEmailAddress());
		logger.info(destinationContact.getAddressLine());
	}

}
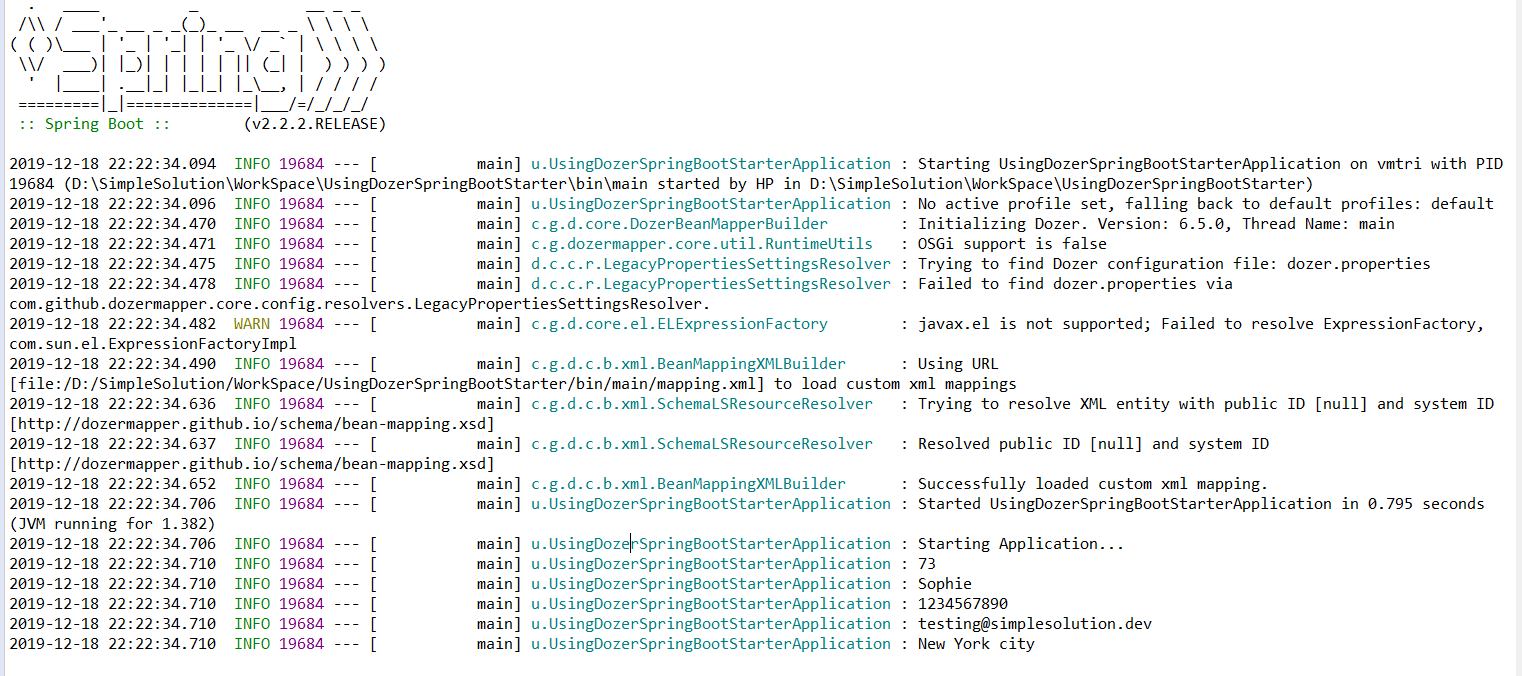
Run the application again and you will get below result on your console.

Observe the console log above we can see that the data from sourceContact object has been copy to destinationContact object as we expected from the setting at mapping.xml file.
Download Source Code
The source code in this article can be found at: github.com/simplesolutiondev/UsingDozerSpringBootStarter
or download at:
Happy Coding 😊