Creating Spring Boot Application with Spring Tool Suite
Tags: Java Spring Boot
In this article we will learn step by step guide to create a new Spring Boot web application using Spring Tool Suite.
You can download Spring Tool Suite from this link
First step, open Spring Tool Suite on your machine and choose menu File -> New -> Spring Starter Project

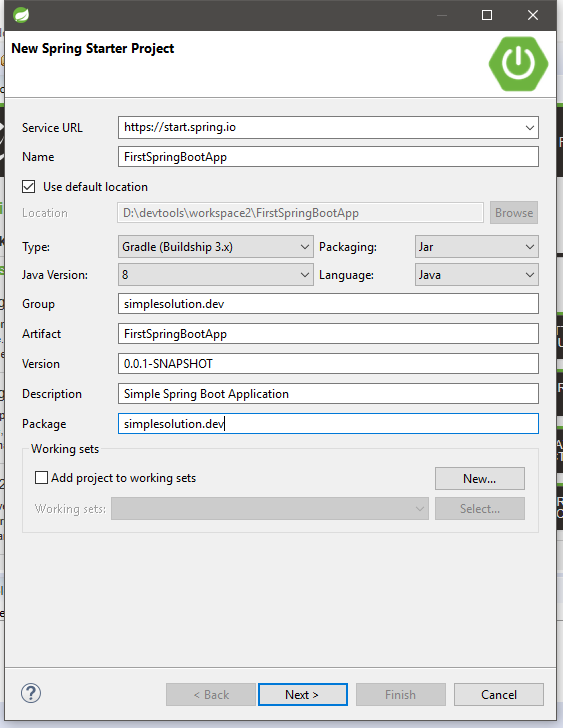
Then input new project information on New Spring Starter Project popup as below and click on Next button.
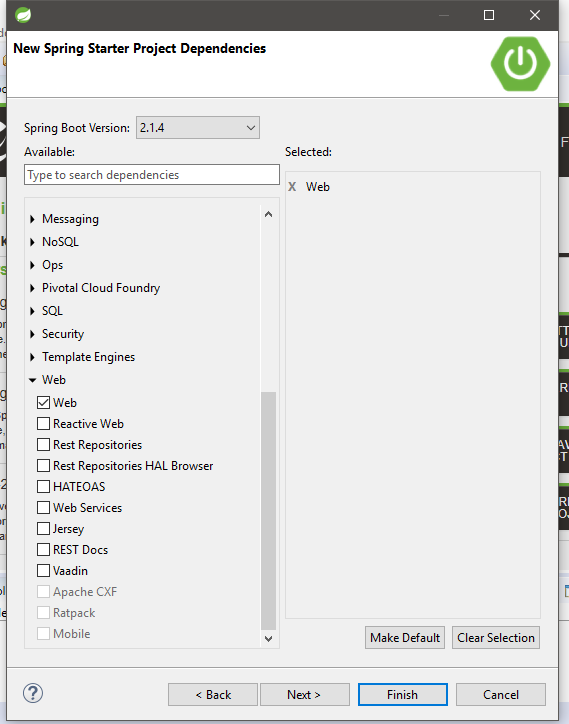
Choose dependencies for your Spring Boot project on New Spring Starter Project Dependencies popup, in this example we only choose Web dependency to create a simple web application, then click on Next button.
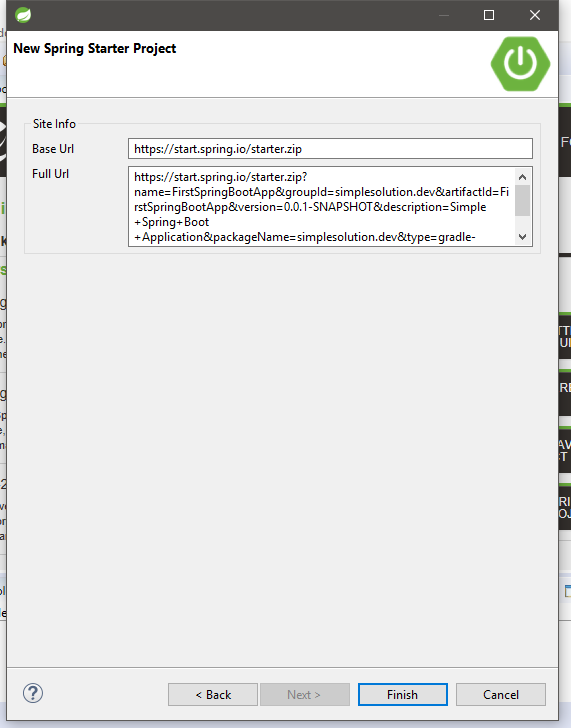
Before finish creating project, Spring Tool Suite will show to you the link that you can manually download the project online. Let click on Finish button to finish creating propject.
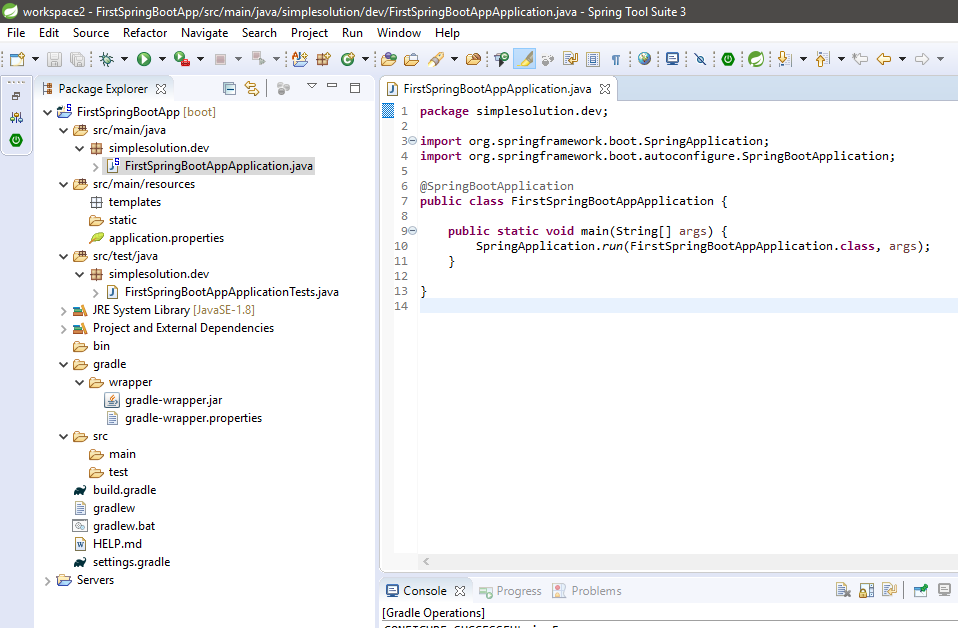
After finish creating, we get the new project with structure as below screenshot. There is a main class generated to bootstrap the Spring Boot application by using SpringApplication.run() method.
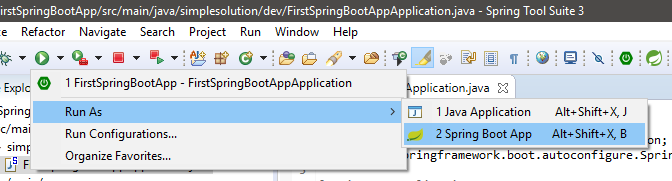
Now you can run the created Spring Boot application by click on Run icon -> Run As -> Spring Boot App
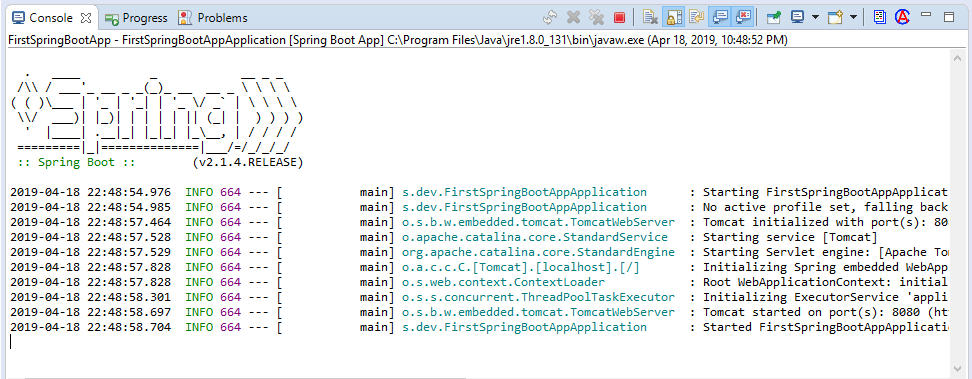
During the Spring Boot application starting you can see the log of application in Console window as below.
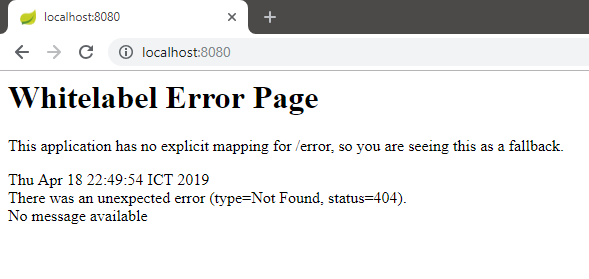
After finish starting the application, the embedded Tomcat server by default started at port 8080 to serve your web application. Let open the web application on browser via URL http://localhost:8080/ to see the default error page as below as we are not implement any feature for the app.
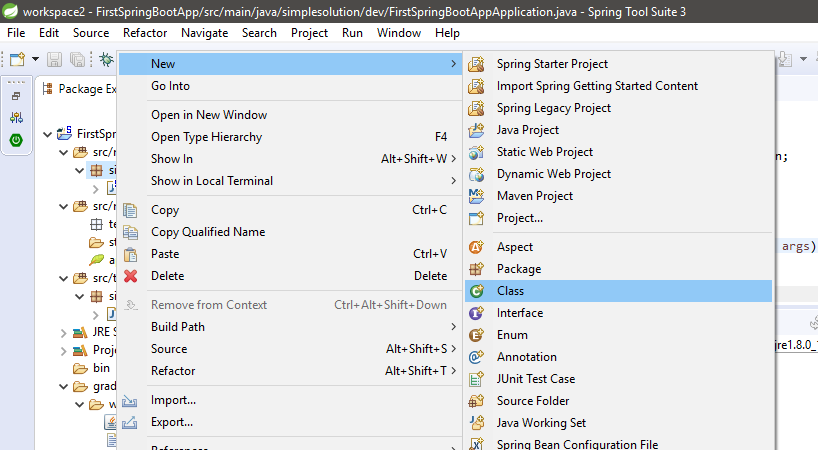
Next step, create first controller class for our application by right click on package and choose New -> Class
And input new class information as below screenshot then click Finish button.

A new HelloController.java class will be created, then we implement a simple controller to show a message when user access the web app.
package simplesolution.dev;
import org.springframework.web.bind.annotation.RequestMapping;
import org.springframework.web.bind.annotation.RestController;
@RestController
public class HelloController {
@RequestMapping("/hello")
public String hello() {
return "Hello Message from simplesolution.dev";
}
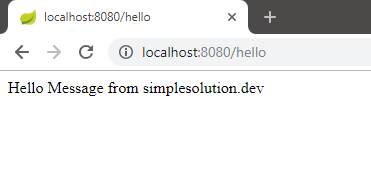
}Re run the application and open browser the URL http://localhost:8080/hello to observe the result.
That’s all we need to know to create a simple Spring Boot Web application using Spring Tool Suite.
Download Source Code
The source code in this article can be found at: https://github.com/simplesolutiondev/FirstSpringBootApp
Happy Coding 😊